

Contents
Step 5: Schedule #
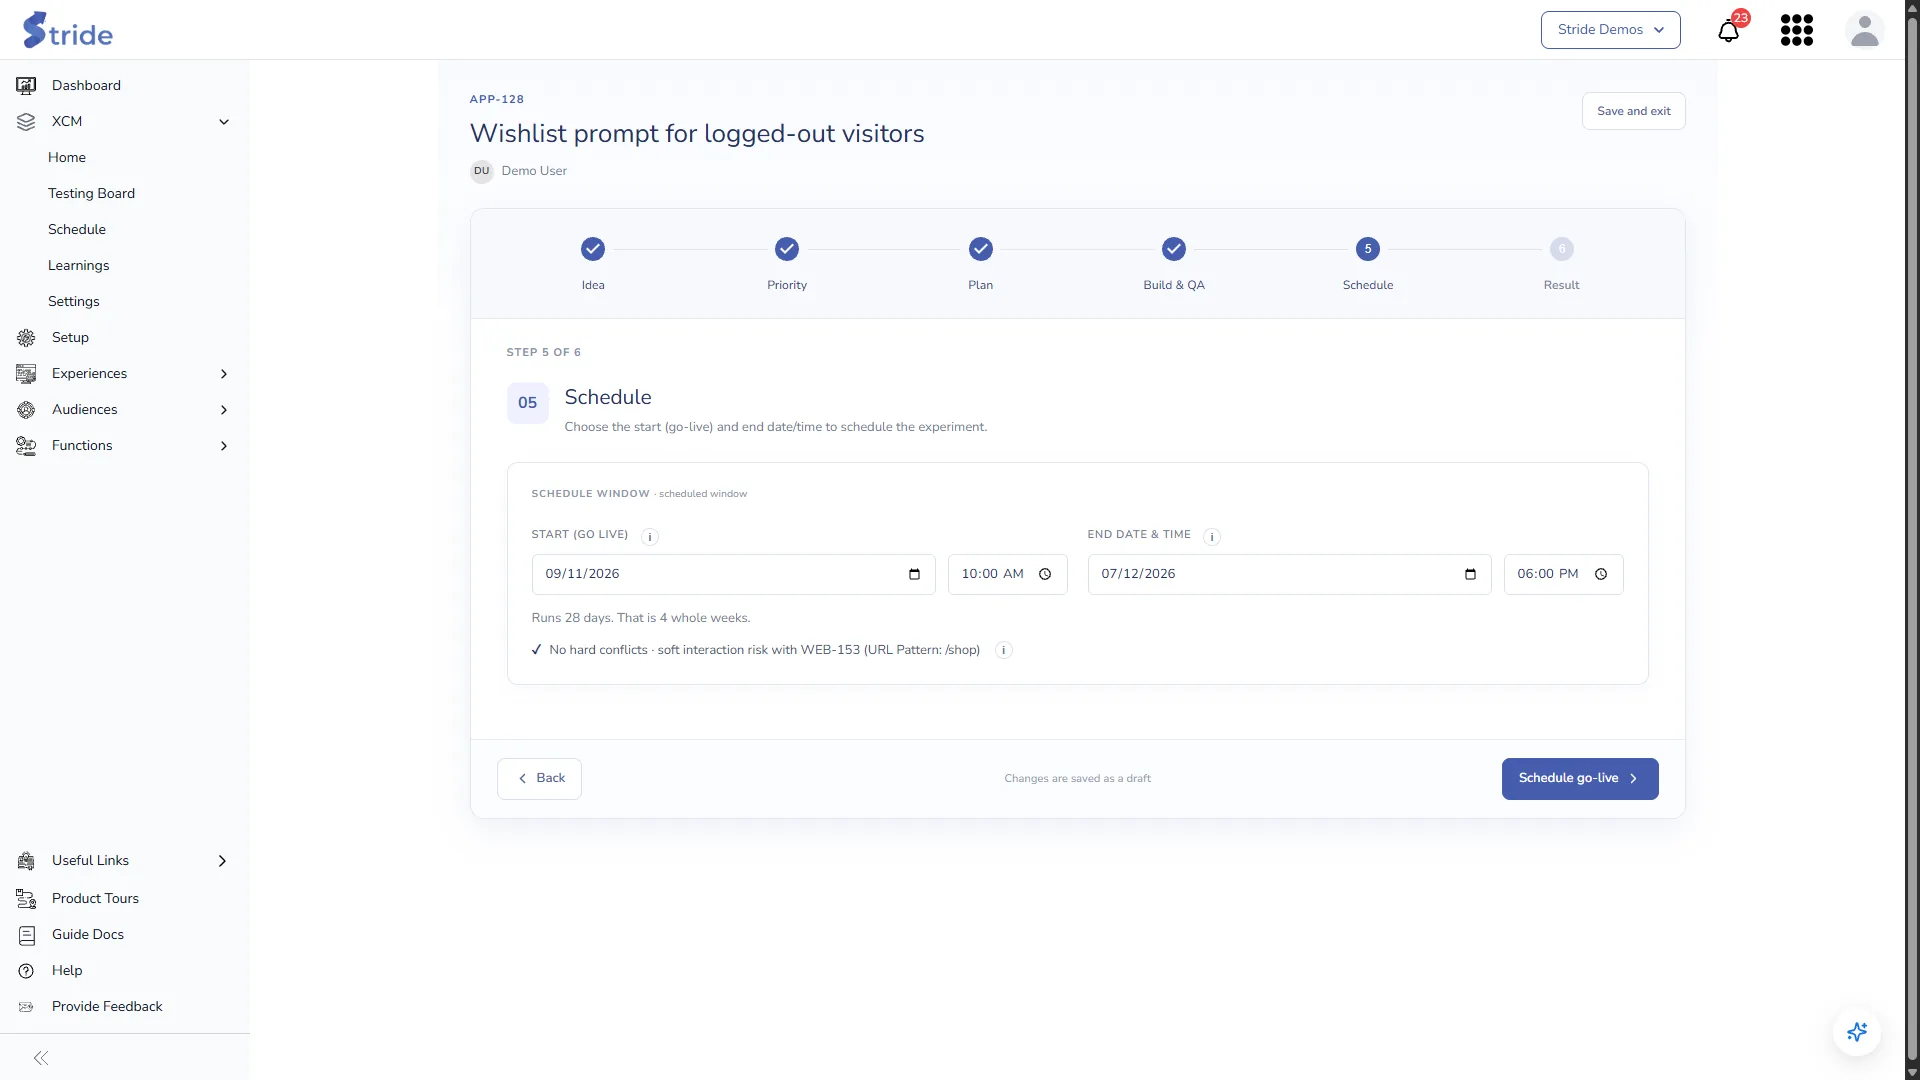
- Set Start (Go live): a date and a time. The time defaults to 10:00.
- Set End date & time. The time defaults to 18:00, and the end date can’t be before the start date.
- Check the run length. If it isn’t a whole number of weeks, click Extend to N days to round it up; whole weeks avoid weekday bias.
- Check the conflict line. It lists live and scheduled tests whose dates overlap this one and that share a Hard or Soft location value.
- Click Schedule go-live. The test moves to Live straight away. You need both a start and an end date to do this.
Note
XCM doesn’t start or stop anything in Adobe Target. Start the activity in Target yourself; the dates in XCM are your record and drive the Schedule.
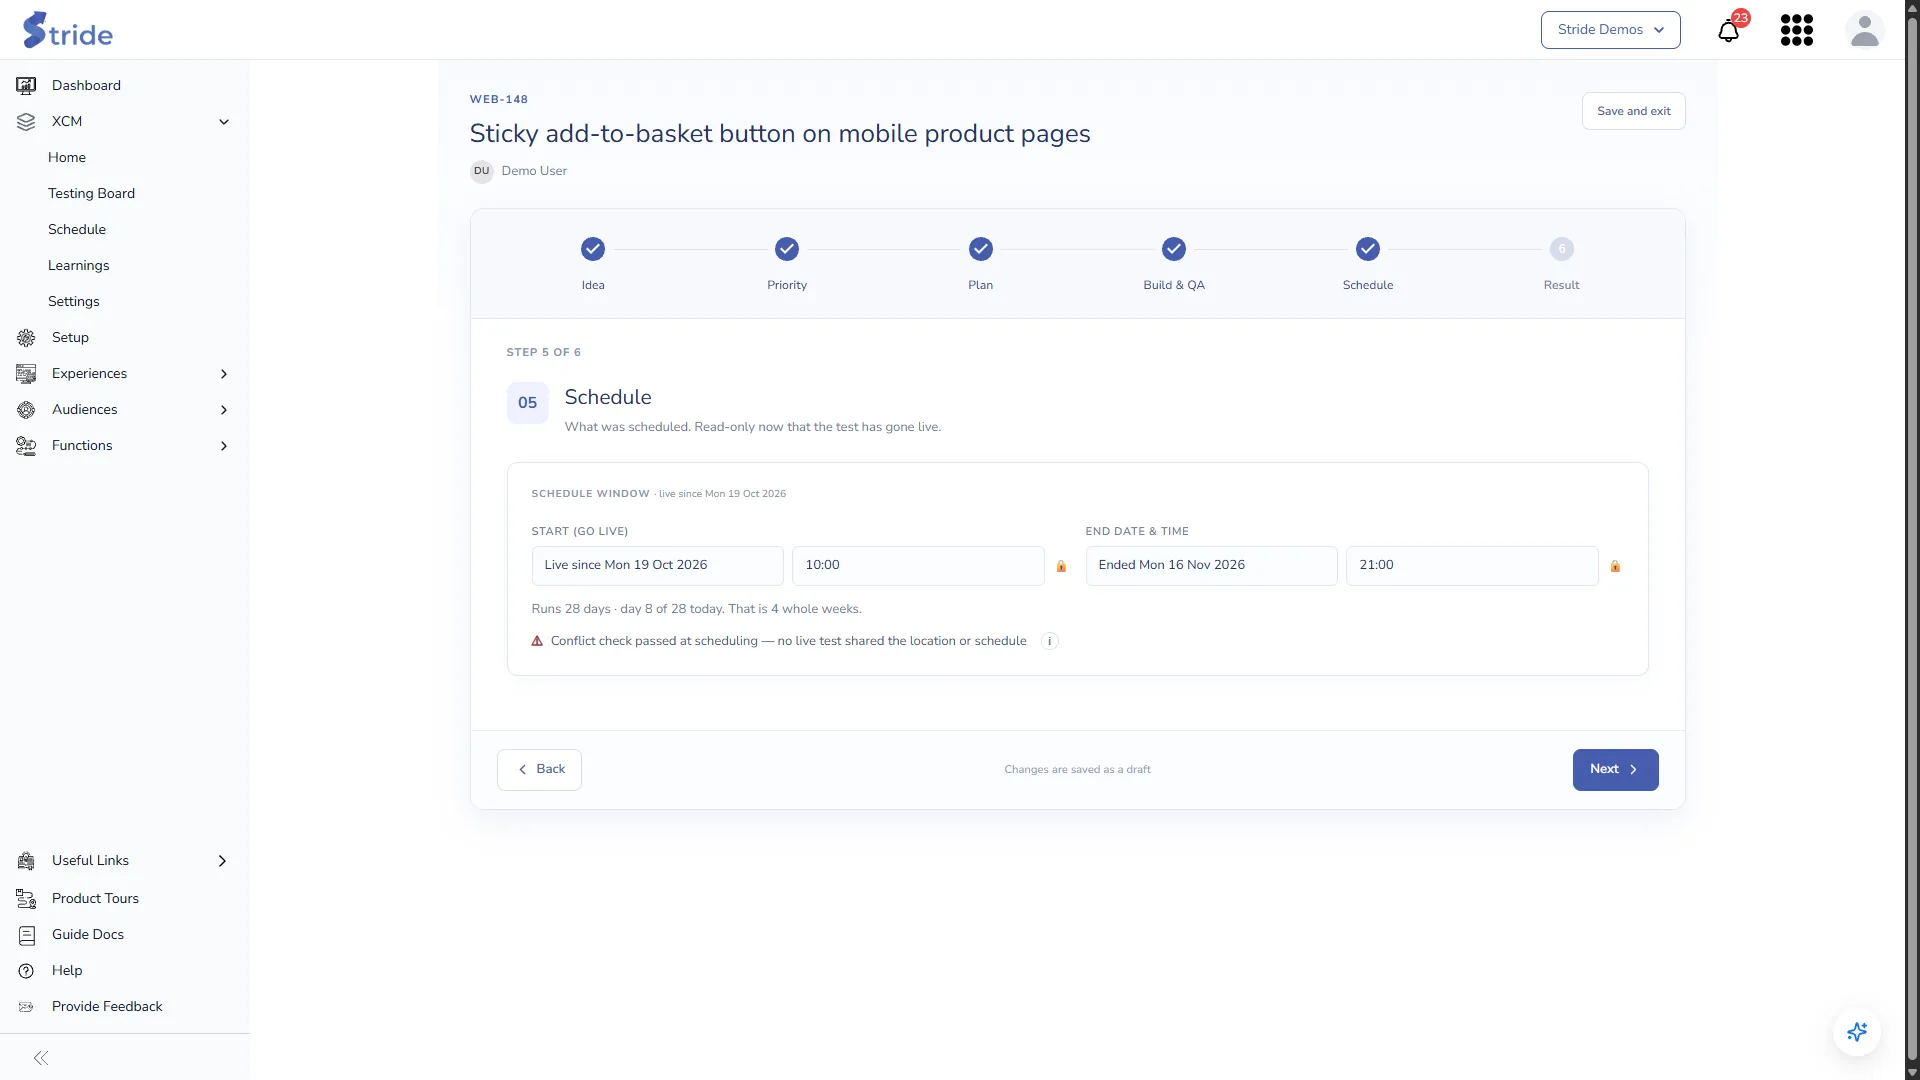
Once a test is live, this step is read-only and shows the dates it ran.
Step 6: Result #
When the test has stopped, drag its card into Analysing on the Testing Board, then open the Result step.
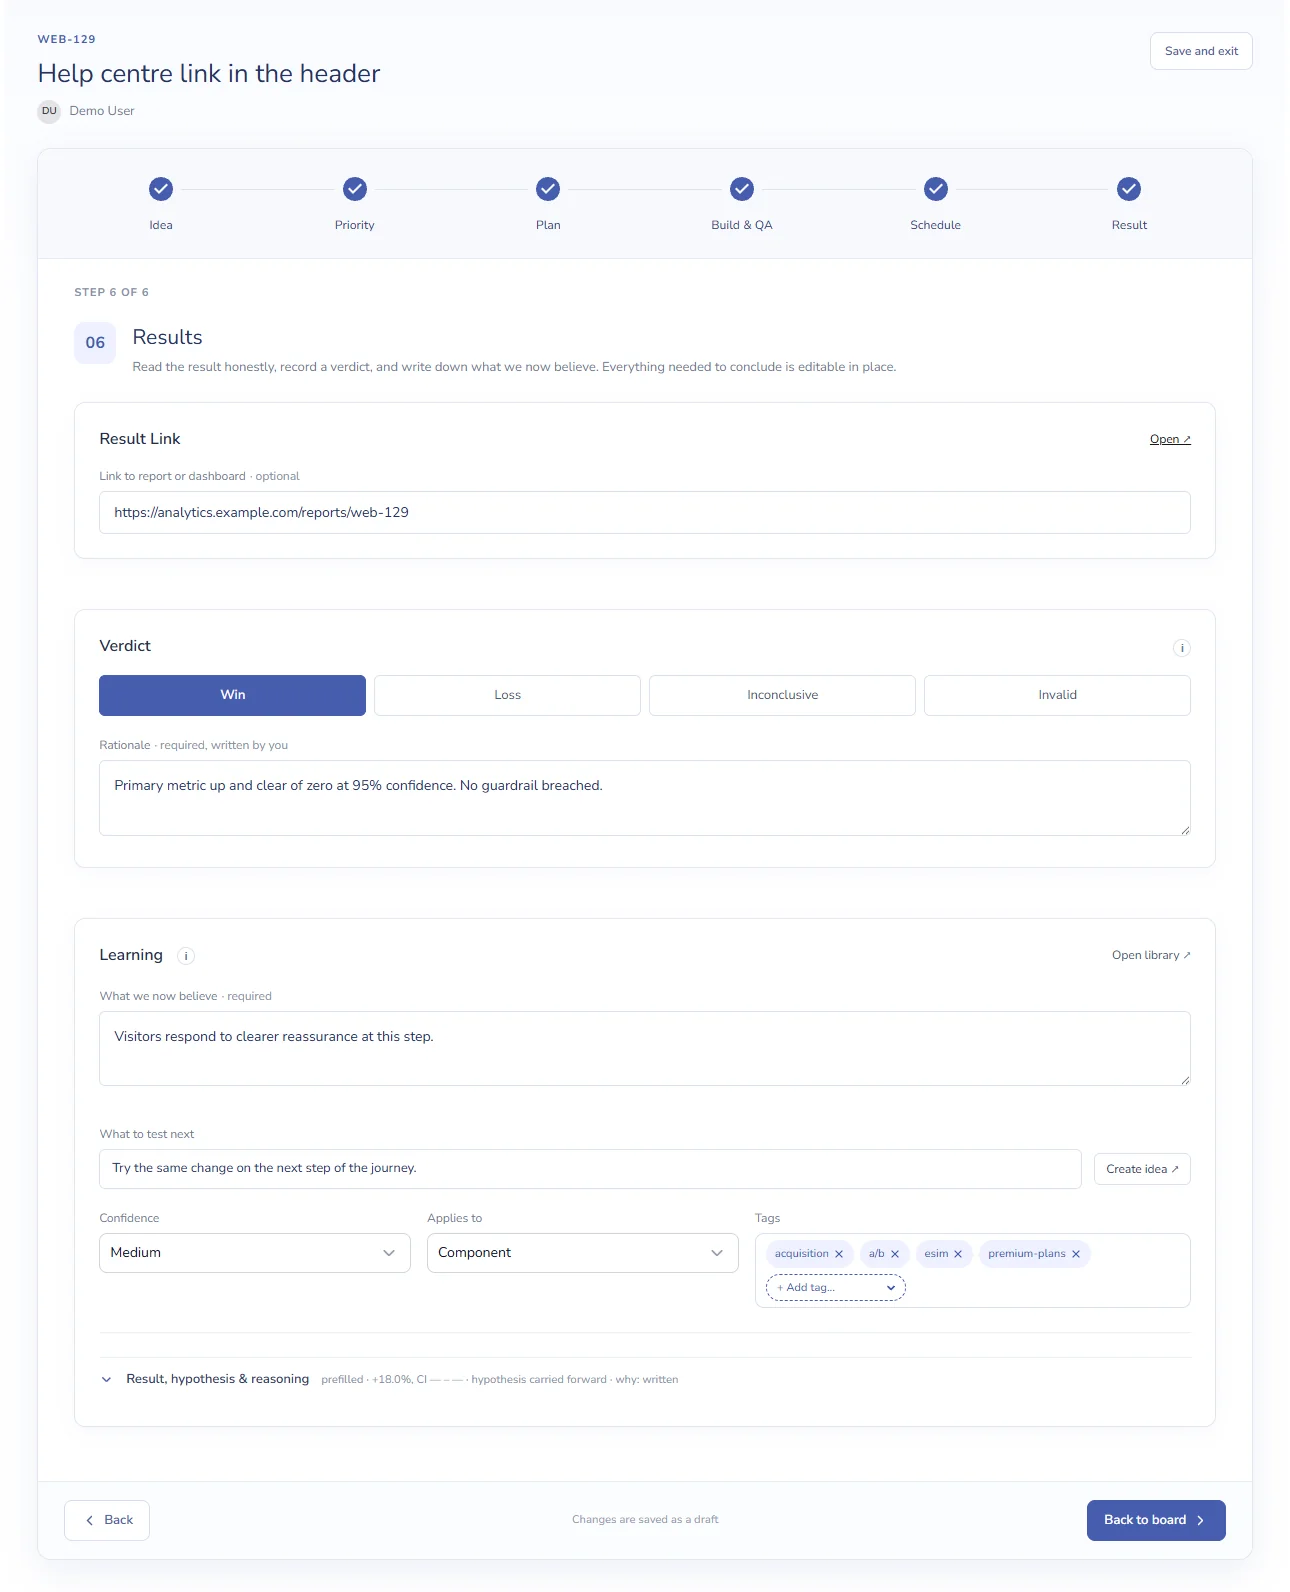
| Section | What to enter |
|---|---|
| Result Link | Optional link to the report or dashboard with the numbers. Open ↗ opens it. |
| Verdict | Win, Loss, Inconclusive or Invalid. |
| Rationale | Why you chose this verdict: validity, the confidence interval, anything that qualifies it. |
| What we now believe | The learning, stated so that a later test could prove it wrong. |
| What to test next | A follow-up idea. Create idea ↗ turns it into a new idea with the same tags and opens it. |
| Confidence / Applies to | How sure you are (High, Medium, Low), and whether the learning applies to a Page type, a Component or the whole Property. |
| Tags | The learning’s tags. They start as the test’s tags. |
| Result, hypothesis & reasoning | Optional detail: What happened, What we believed (carried over from the hypothesis) and Why we think that. |
The learning is saved to Learnings once What we now believe has text, and it updates as you type. Each visit that changes it adds a revision.
Click Conclude test to move the test to Concluded and go back to the board.


