

A template holds the HTML, CSS and form definition that every experience built from it uses. You build it in the template editor, with a live preview beside the code.
Plan
Creating your own templates needs the Create Own Templates feature, which is not on the Starter plan. Global templates are provided by Stride: you can open and duplicate them, but not change them.
Manage templates #
Go to Experiences → Manage Templates.
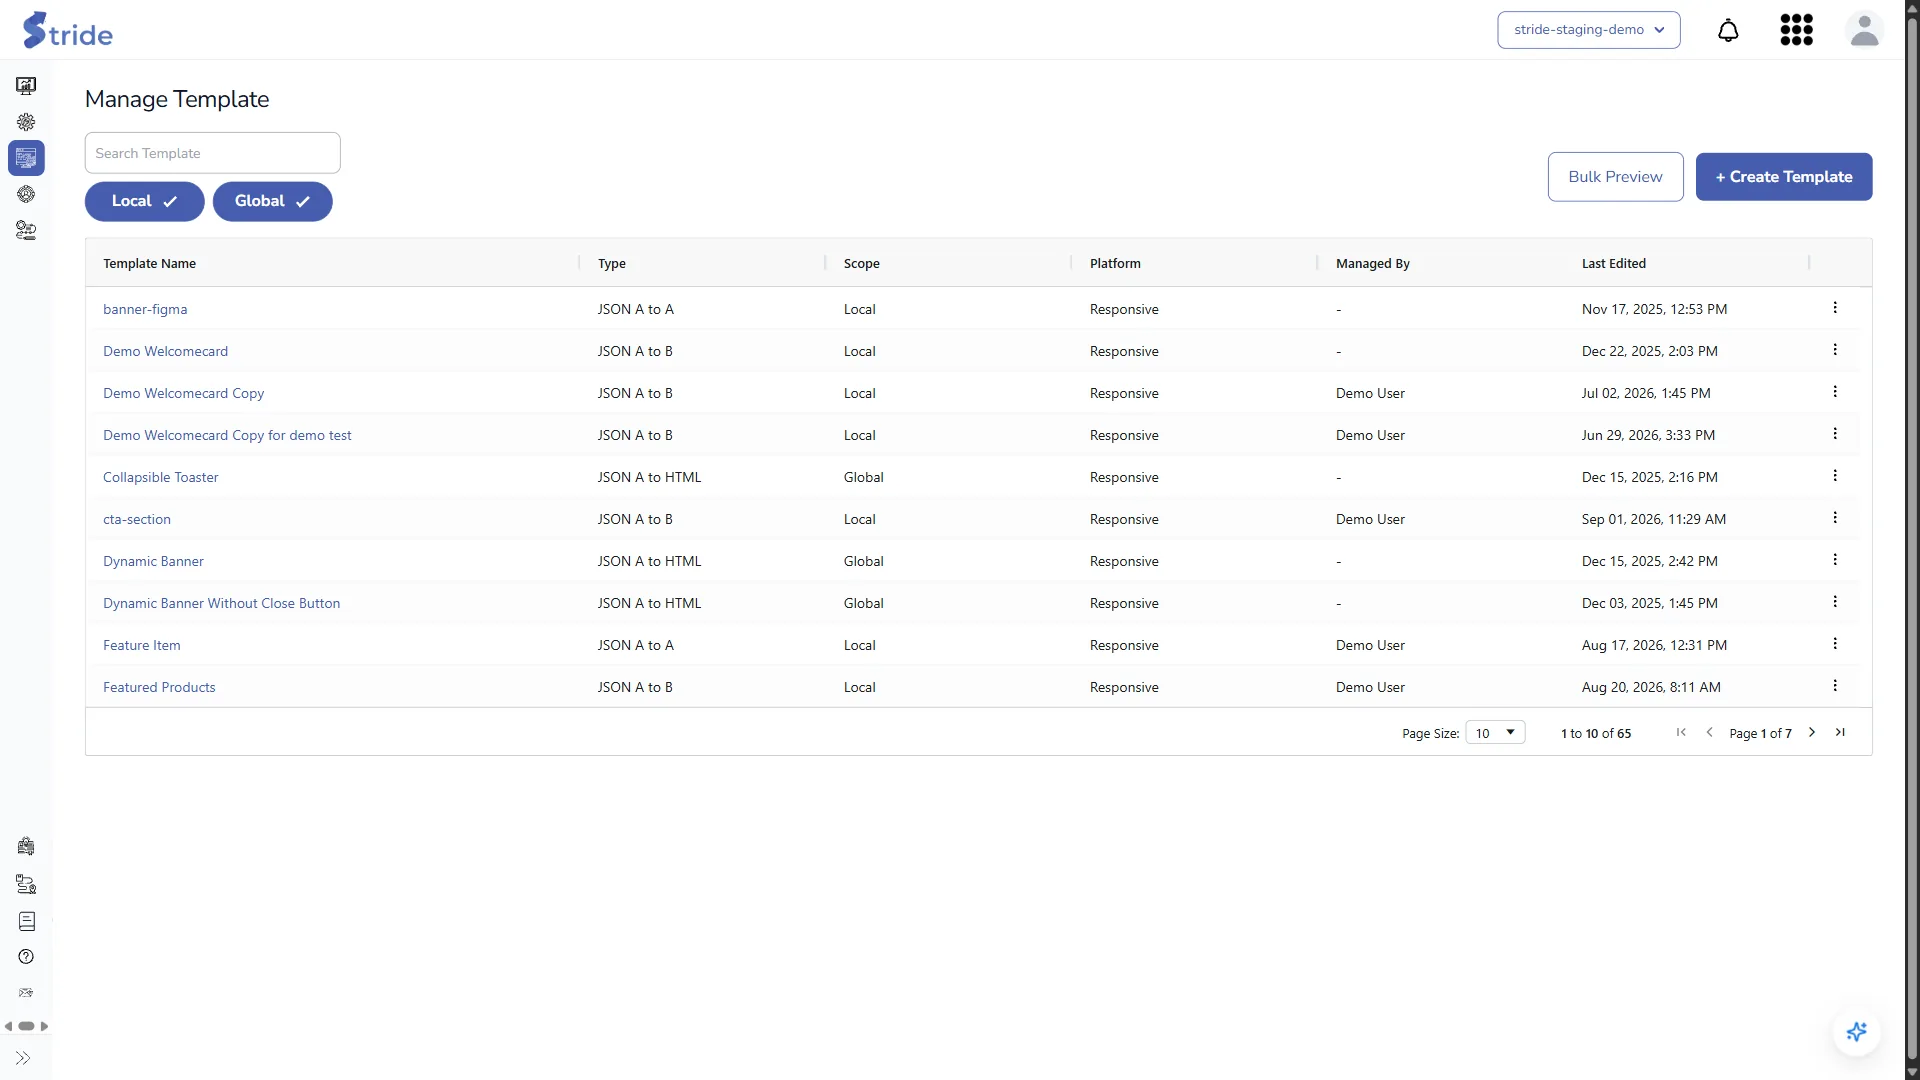
| Column | Meaning |
|---|---|
| Type | How the template renders. Stride works it out from your code (see Template types). |
| Scope | Local (your organisation’s) or Global (provided by Stride). |
| Platform | Web Only, Mobile Only or Responsive. |
| Managed By / Last Edited | Who changed it last, and when. |
- Use Local and Global to filter the list, and Search Template to find one by name.
- Bulk Preview previews every template in the list, one after another.
- Click a template name to open it. Global templates open read-only.
- The ⋮ menu offers Edit and Delete for local templates, and Duplicate for any template. Duplicate creates a local copy called
<name> Copy, which is how you adapt a global template. - Delete first lists the experiences that use the template. If you delete it anyway, those experiences show “Template deleted” in Manage Experiences.
Template types #
| Type | When Stride uses it | What experiences produce |
|---|---|---|
| JSON A to A | Every key path in the JSON schema is an exp_json_field in the Config JSON. | JSON with the same shape as the form. |
| JSON A to B | The JSON schema has key paths that aren’t form fields. | Form values mapped into the JSON schema’s shape. |
| JSON A to HTML | The JSON schema has a config_obj_key and the HTML contains that object. | HTML. |
| No Preview | The template has no HTML and no CSS. | JSON, with no preview. |
Create or edit a template #
Click + Create Template, or click the name of a local template to edit it. The settings and code are on the left; the live preview is on the right.
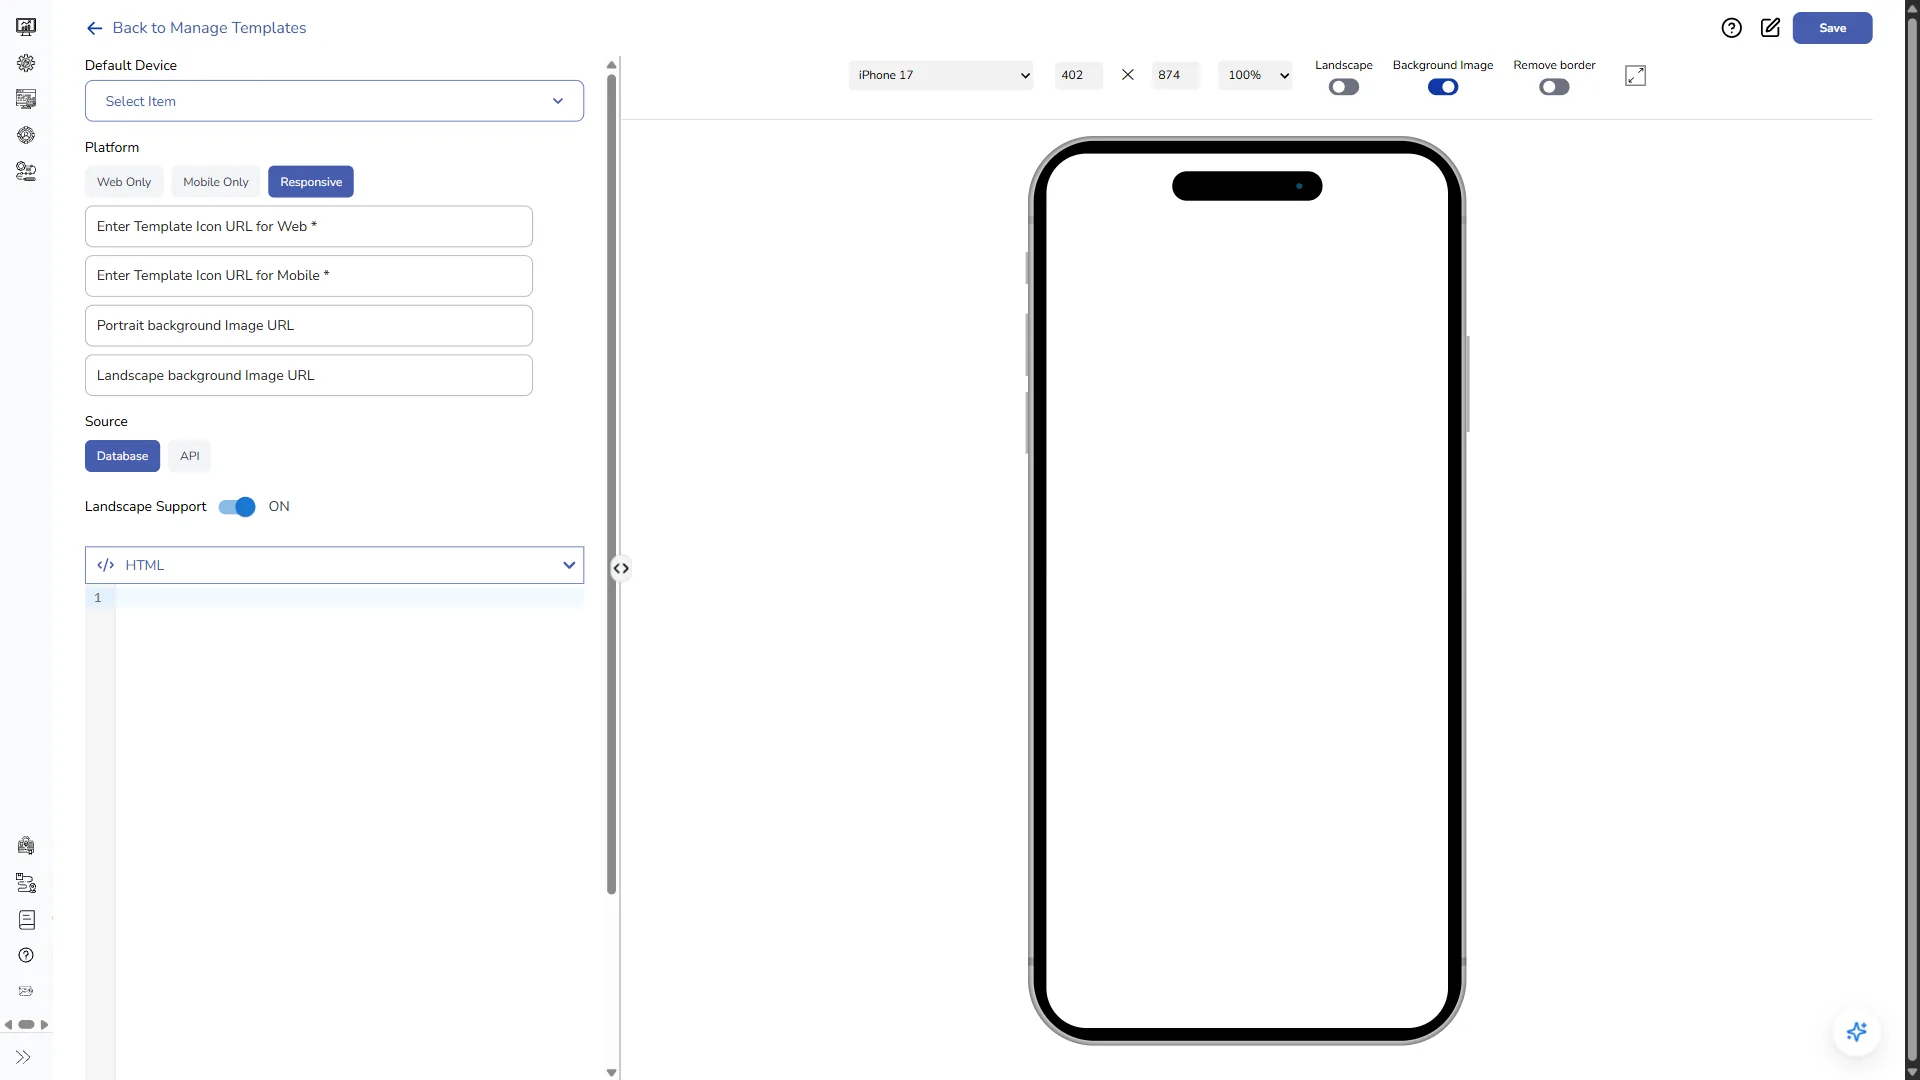
- Choose a Default Device: the device the preview opens on, here and when someone creates an experience from the template.
- Choose the Platform: Web Only, Mobile Only or Responsive. It decides which fields below appear and which devices the preview toolbar offers.
- Enter the icon URL shown for the template in the Choose Template Gallery view: Enter Template Icon URL for Web (Web Only and Responsive) and Enter Template Icon URL for Mobile (Mobile Only and Responsive). They’re required.
- Optionally, enter the URL of a page screenshot to show behind the preview, so people can see the experience in context: Background Image URL for Web Only, or Portrait background Image URL and Landscape background Image URL for Mobile Only and Responsive. Background Image in the preview toolbar shows or hides it.
- Choose the Source: Database (the content comes from the experience form) or API (the content comes from an endpoint you enter in API Endpoint). API appears only if your role allows it.
- For Mobile Only and Responsive templates, turn Landscape Support on to let the preview rotate.
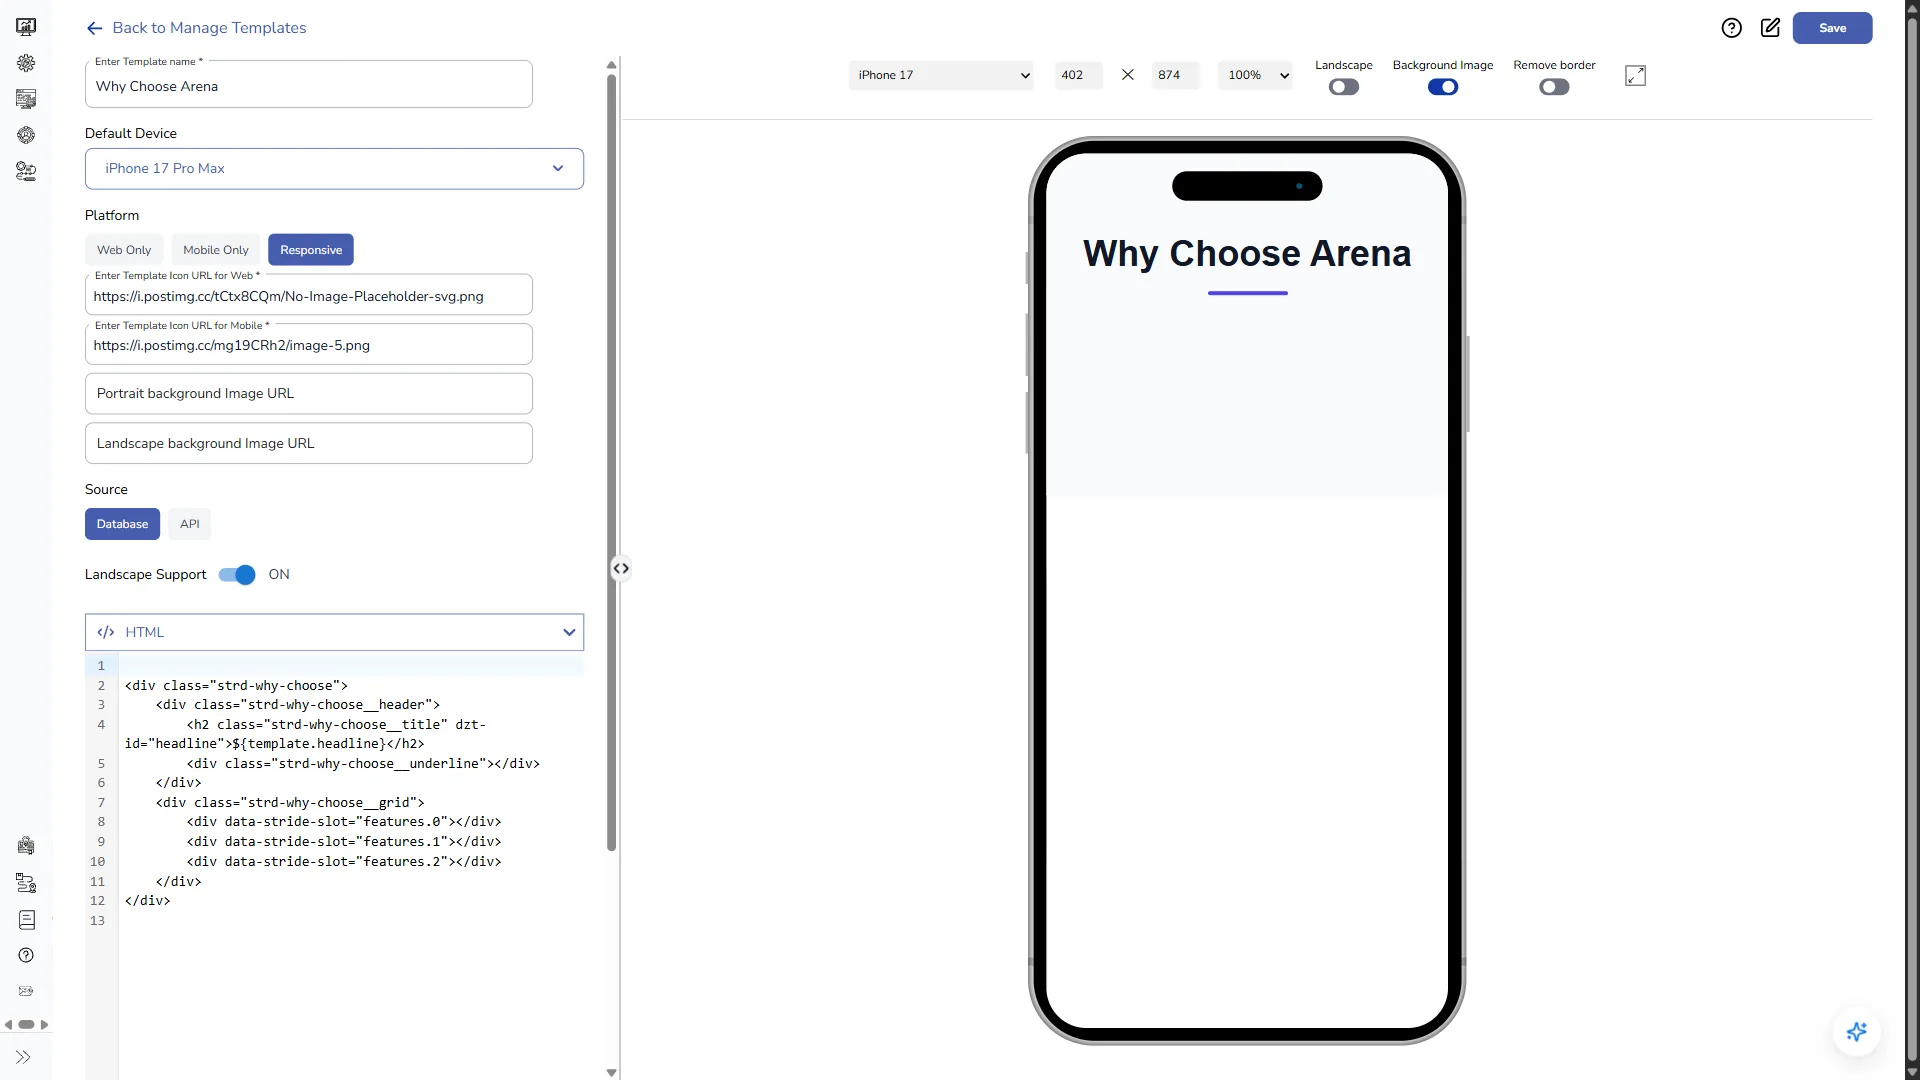
- Write the code. Click a panel’s heading to open or close it:
- HTML: use
${template.<field>}to insert a form value, where<field>is the field’sexp_json_field, and<div data-stride-slot="<field>.<index>"></div>to insert a nested template.
- CSS: the styles for the HTML.
- Config JSON: the experience form. See Define the experience form (Config JSON).
- JSON schema: the shape of the output JSON. Together with the Config JSON it decides the template type.
The preview updates as you type. There’s no type selector and no separate apply step.
- To find an element in the code, click the pencil icon at the top right (Enable Element Inspector), then click the element in the preview. It isn’t available for No Preview templates.
- Click Save.
- For a new template, the Template Name window opens. Enter the name in Enter Template name and click Save.
- For an existing template, change the name in the Enter Template name field at the top of the editor if you need to; Save saves straight away.
Template names must be unique in the organisation, and capitals don’t make a name different.
Import from Figma #
You can start a Web Only or Mobile Only template from a Figma design. Import doesn’t appear for Responsive templates and is disabled for global templates.
- Under Import, click Figma.
- In Import From Figma, enter:
- Figma URL: the link to the Figma file. If the link points to one frame (it includes a node ID), only that frame is imported.
- Figma Access Token: a personal access token from your Figma account settings.
- Click Submit.
Stride turns the design into HTML and CSS and puts them in the HTML and CSS panels. Images aren’t imported: if the design has any, Stride warns you to add them yourself.
Note
Importing replaces the HTML and CSS already in the editor. Nothing is saved until you click Save.
Help in the editor #
The ? icon at the top right offers Start Interactive Tour, a guided tour of the editor, and View Guide Doc, which opens this page in a new tab.


