

Pick a template, fill in its form while you watch a live preview, then save the experience. Sending it to a destination is step 4, covered on its own page.
Before you start #
Who can do this
Saving an experience needs the Owner or Admin role in the organisation. The wizard steps, template views and save buttons you see also depend on your role.
Plan
Each new experience uses one Create Experience from your plan quota. If + Create Experience is missing from Manage Experiences, the quota is used up: check My Plan.
- You need at least one local or global template. If there are none, Stride offers Create New Template.
- Image upload fields need a default Contentful integration.
Create an experience #
The wizard has four steps: Choose Template → Configure Experience → Create Experience → Activate Experience. This page covers steps 1 to 3. Step 4 is on Activate an experience.
Step 1: Choose a template #
- Go to Experiences → Manage Experiences and click + Create Experience.
- Use Local and Global to filter the list. Local templates belong to your organisation; global templates are provided by Stride, and how many you can use depends on your plan.
- Search by name, or switch views (each view is shown only if your role allows it):
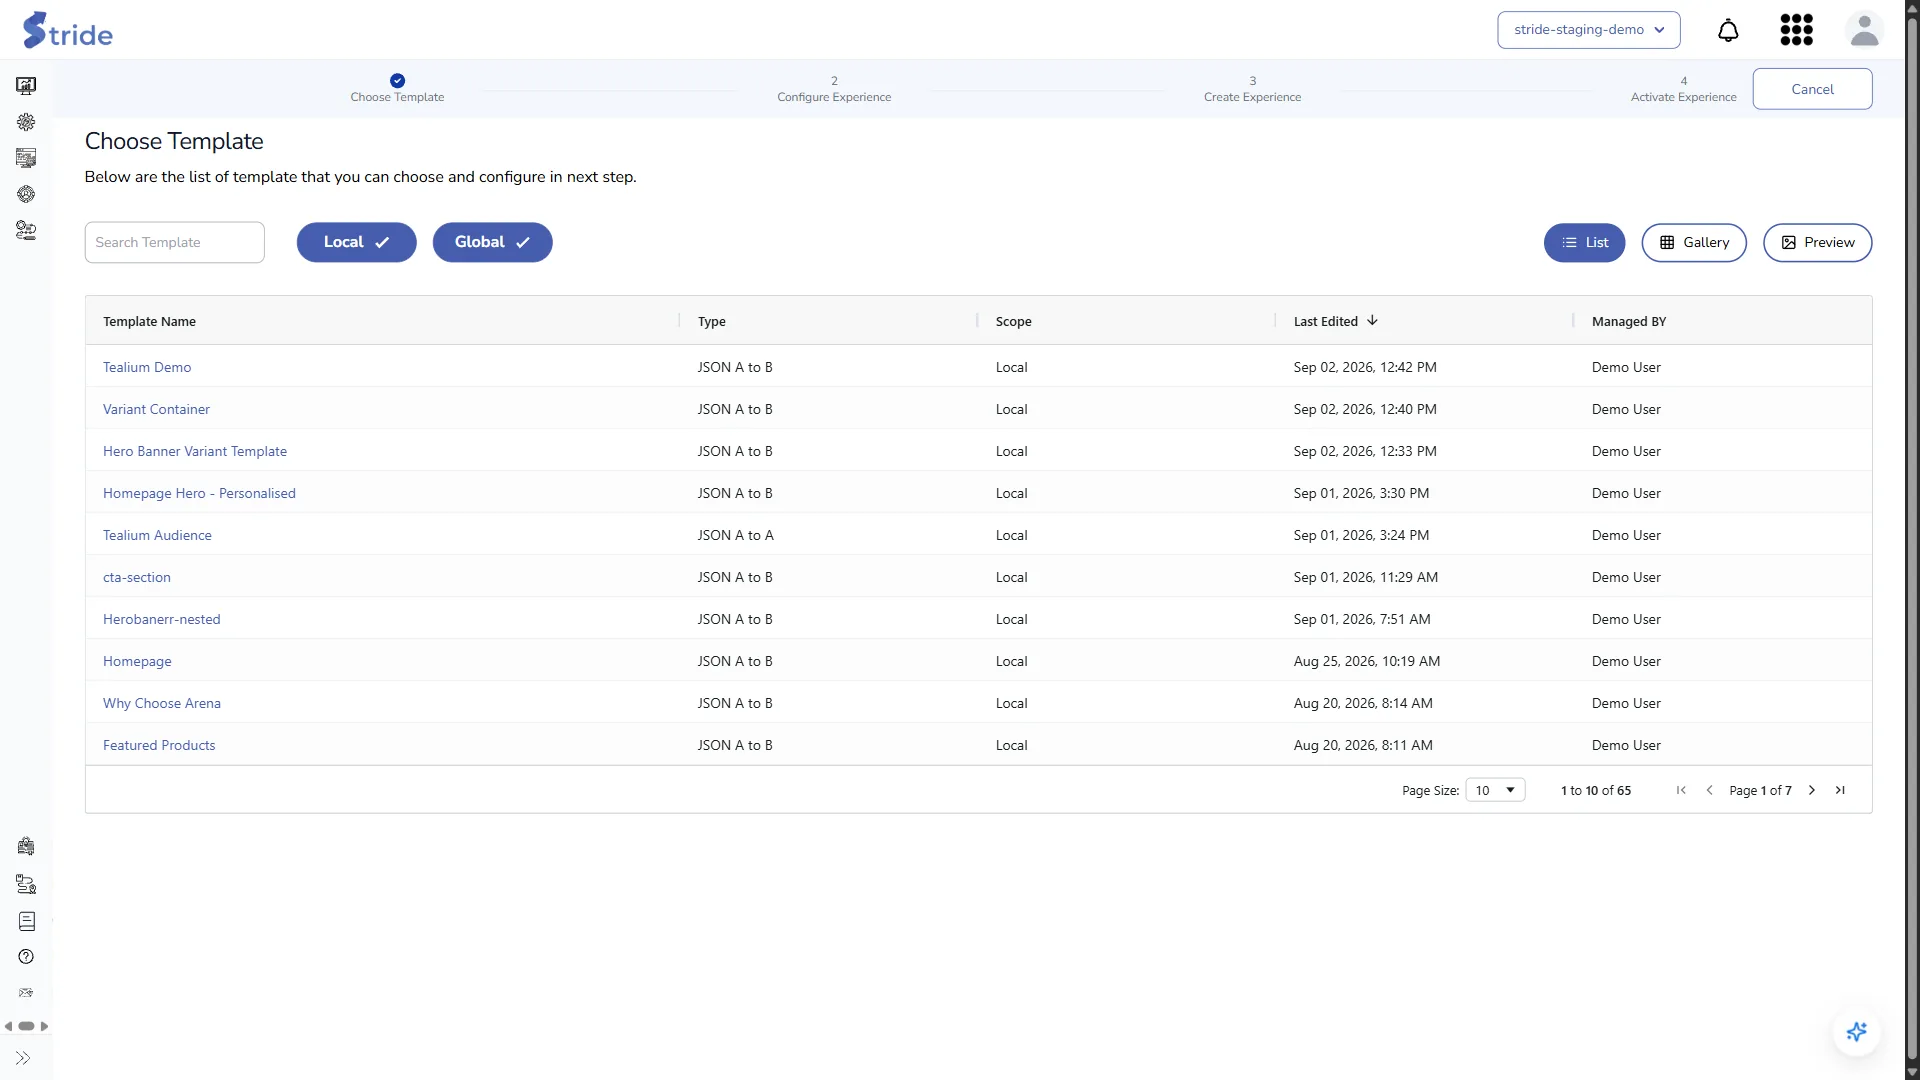
- List (the default): a table of templates.
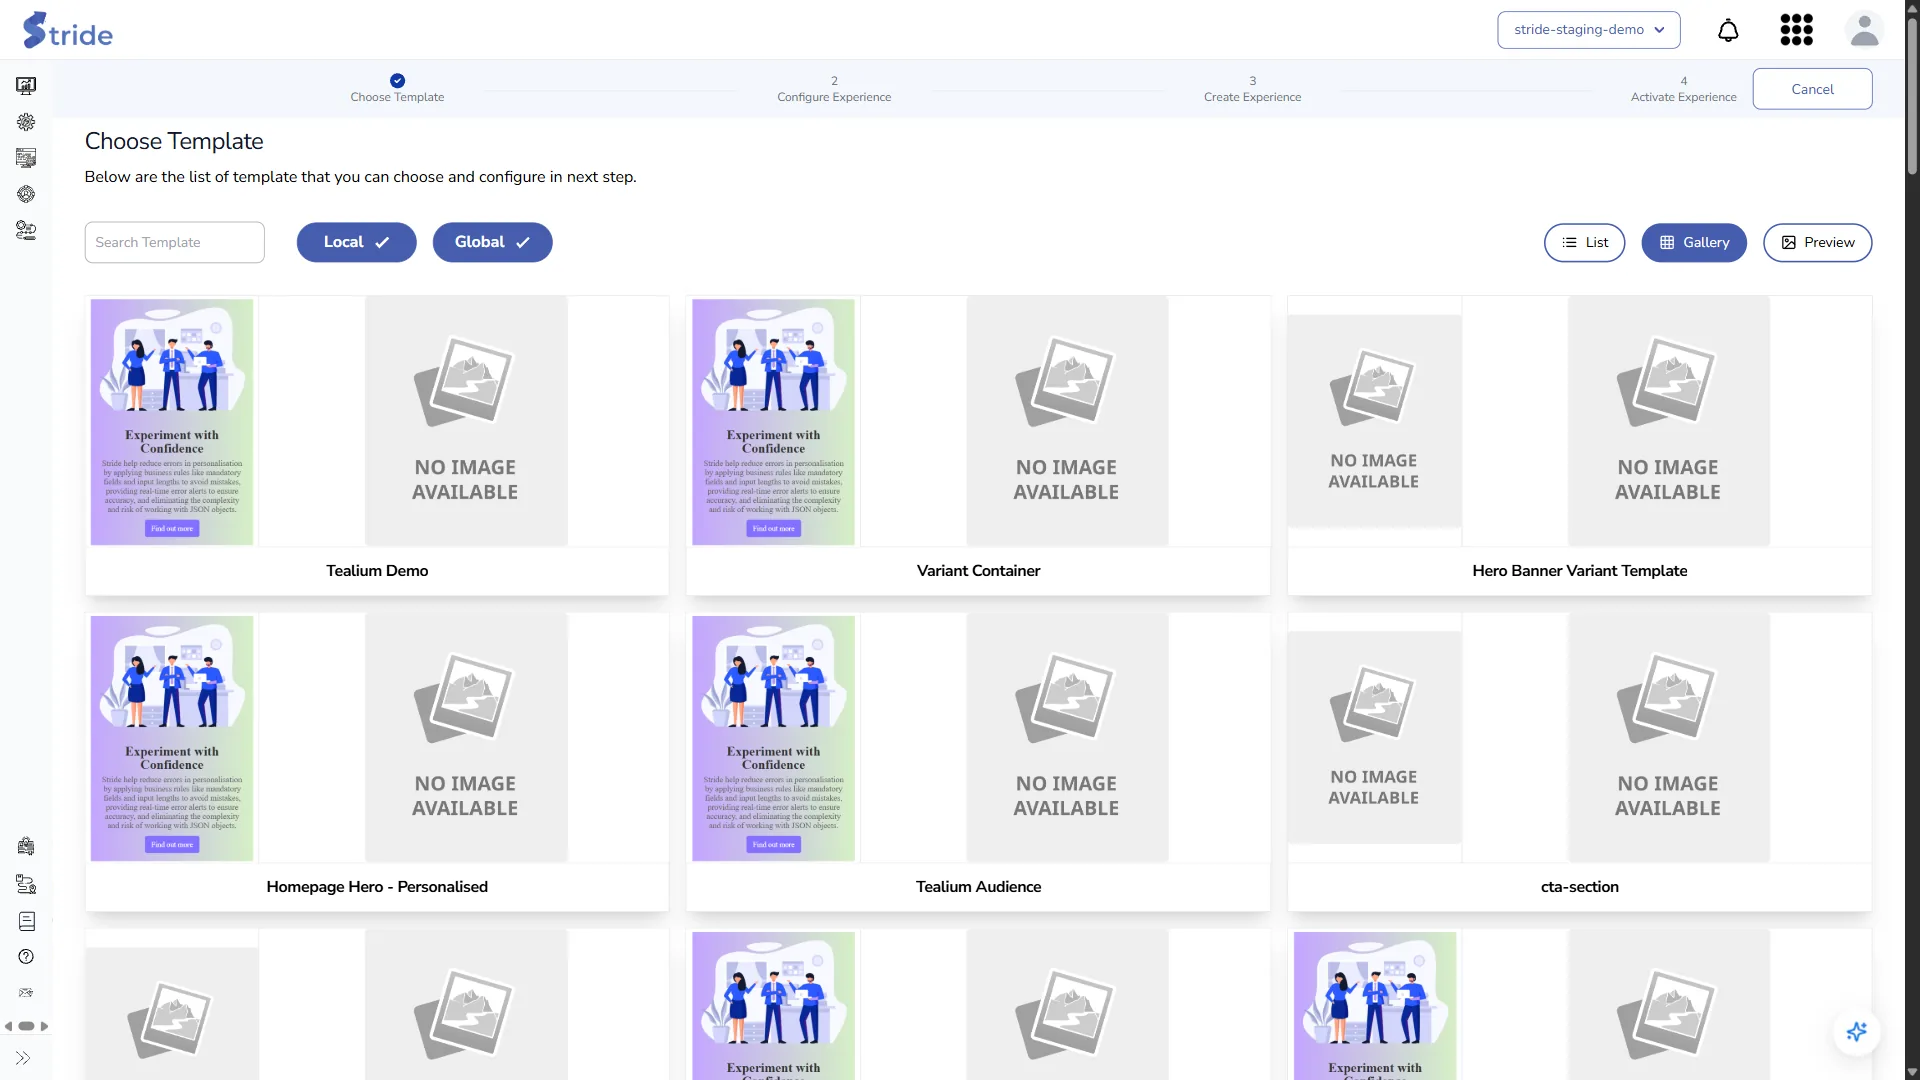
- Gallery: a card with the template icon for each template.
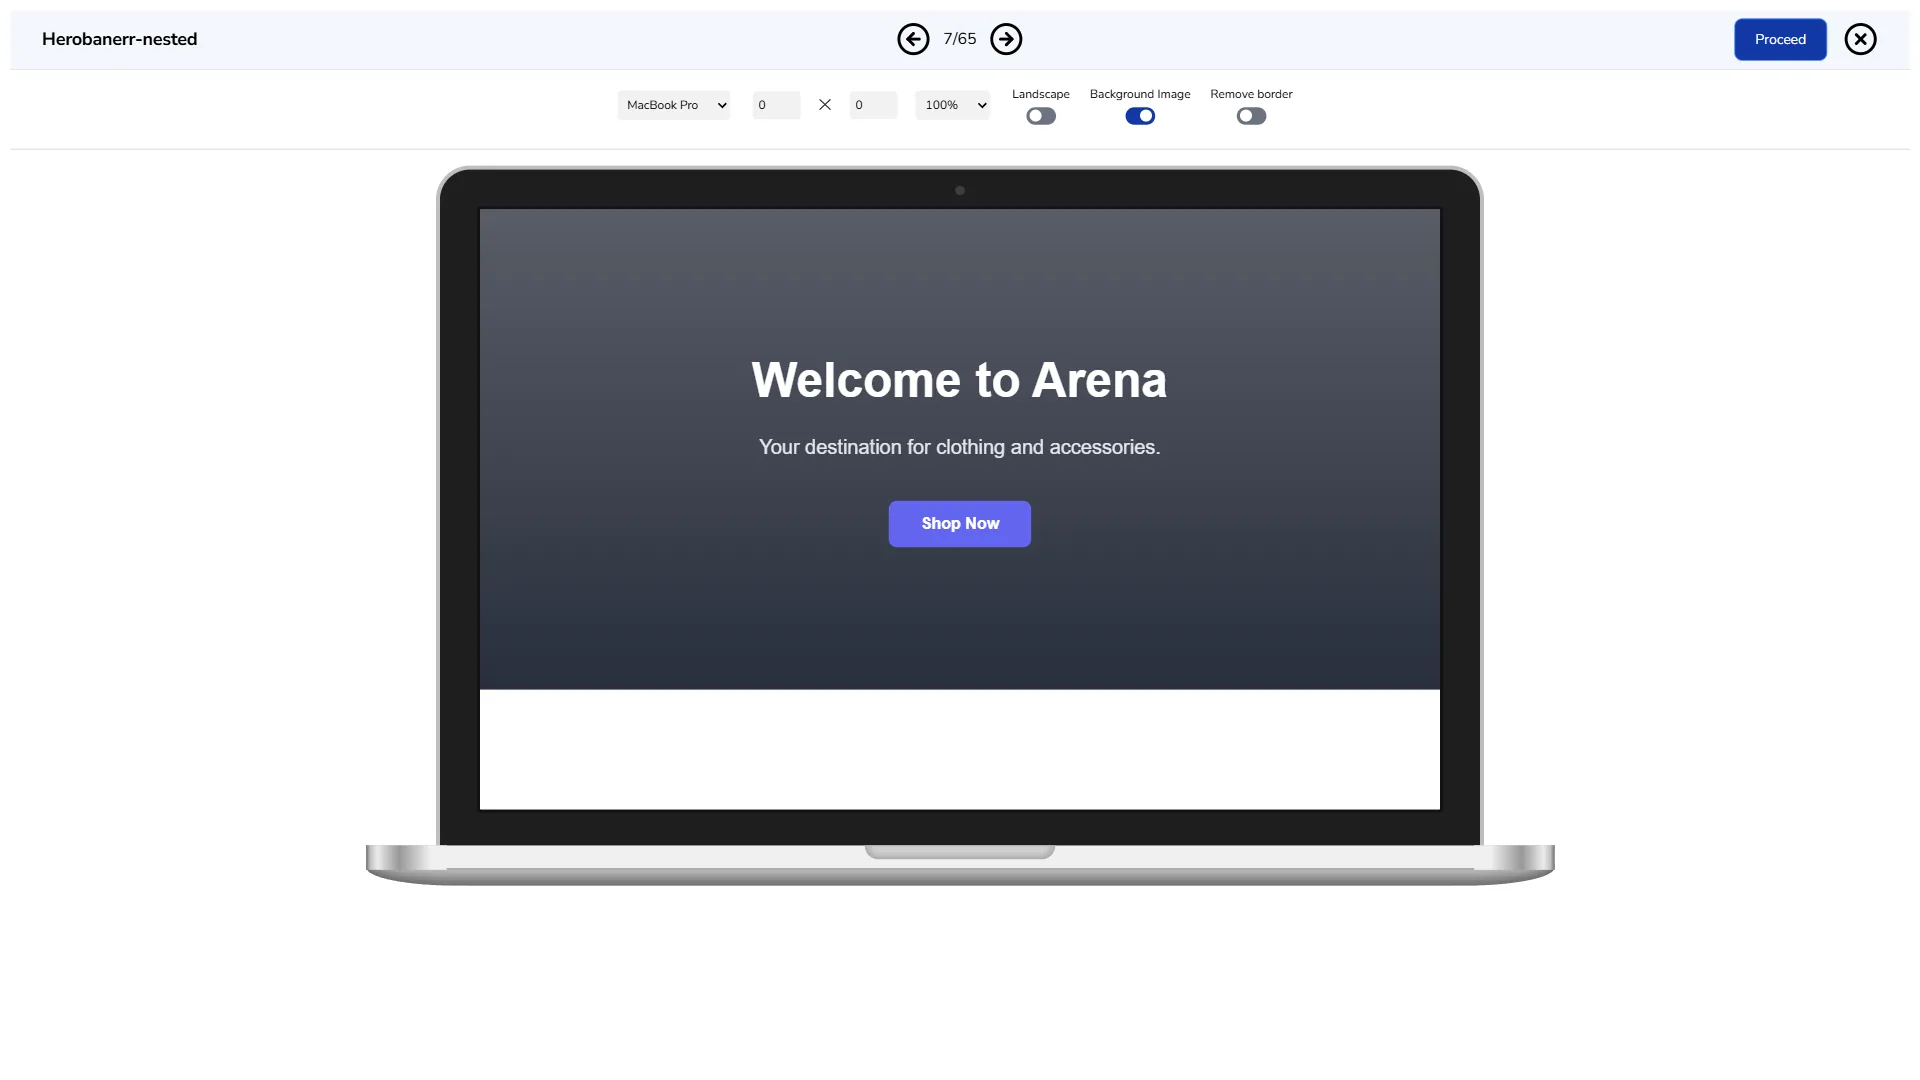
- Preview: each template full size in a device frame. Use the arrows to move between templates.
- Click a template name in the List view, or a card in the Gallery view. Step 2 opens.
Warning
If you pick a template with Proceed in the Preview view, the app can crash when you reach step 3. Click the template name in the List view instead.
Step 2: Configure the experience #
The left panel is the experience form. The right panel is a live preview that updates as you type.
- Check Experience Name at the top left. Stride suggests
<template-name>-<timestamp>. Change it to something meaningful: names must be unique in the organisation, and capitals don’t make a name different. You can change the name until step 4. - Fill in the fields. They come from the template’s Config JSON:
*marks a required field and ⓘ shows its help text. If the template groups its fields, open each group, or use Expand to open them all. The preview updates as you type.

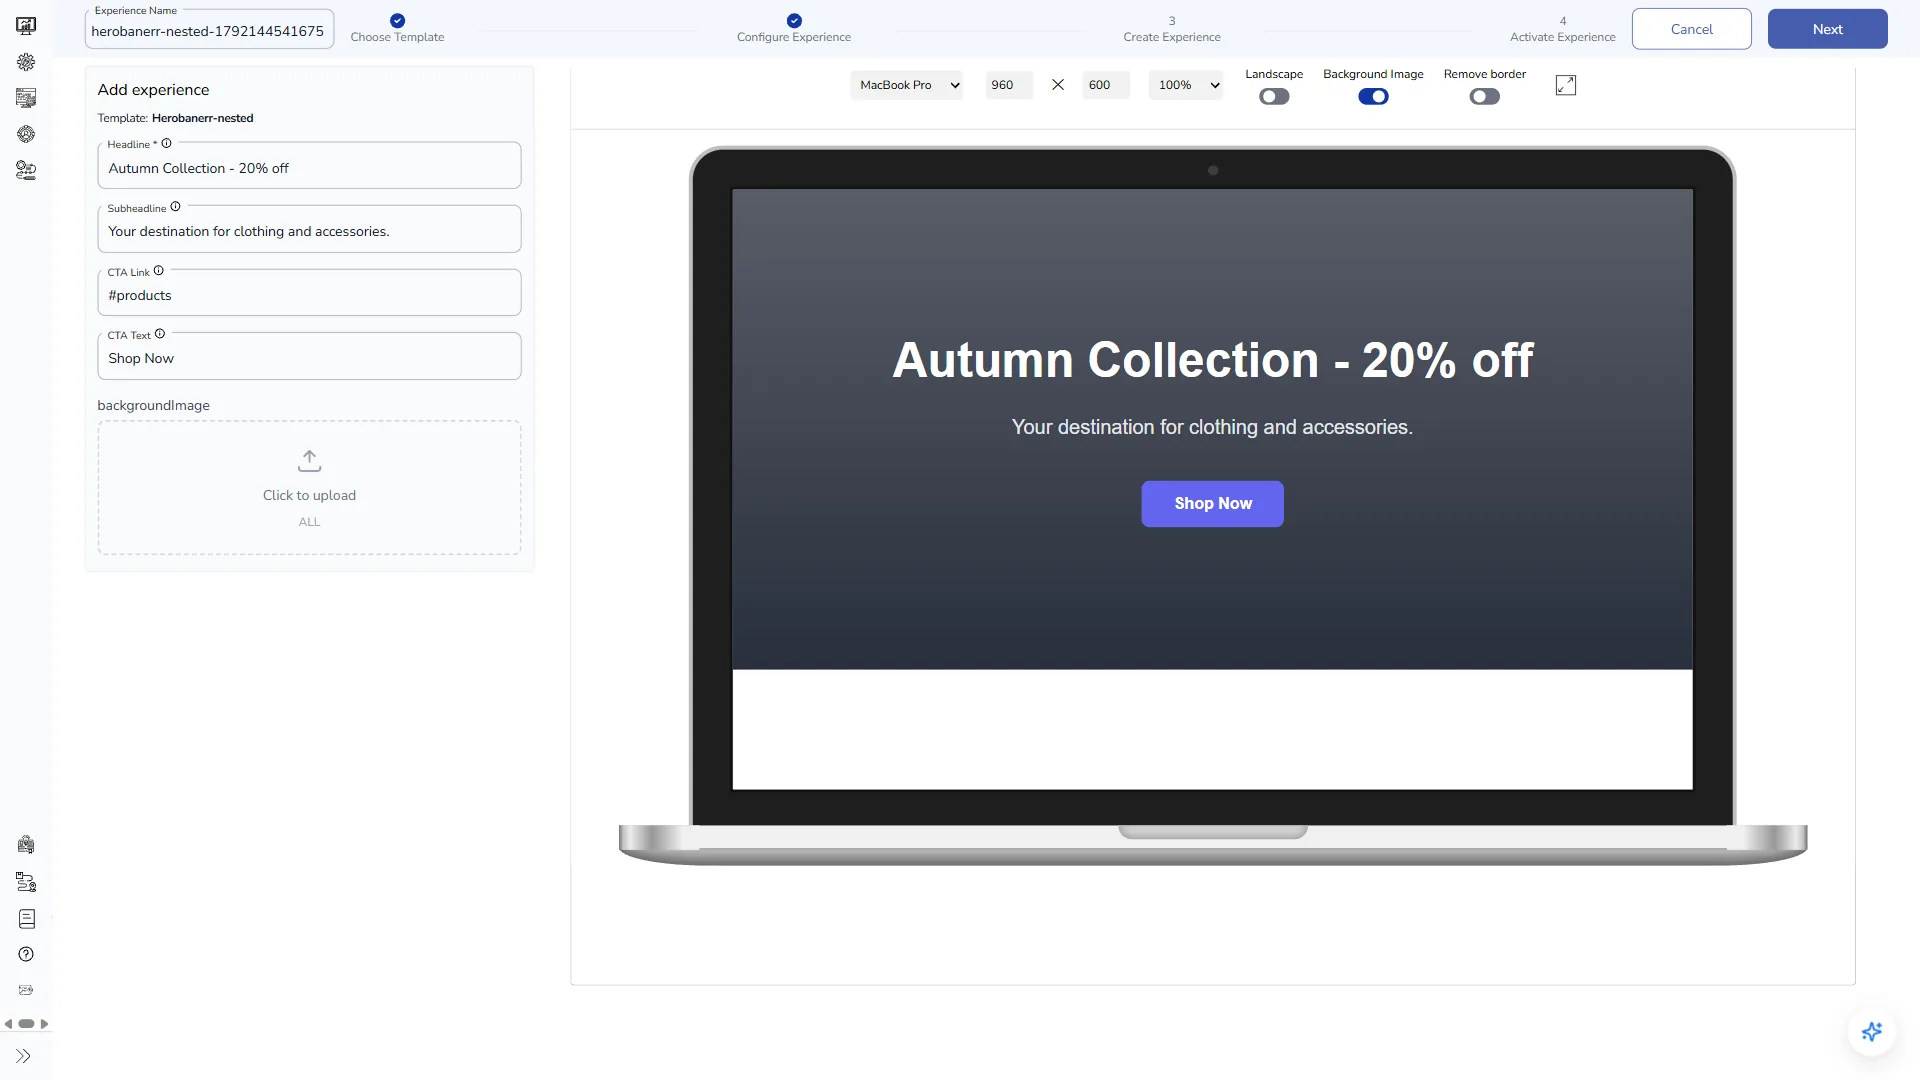
- To add an image, click the upload box and choose a file. Stride uploads it to your default Contentful integration when you click Next. Without one, you get the error “No Contentful integration selected for upload field”.
- Use the preview toolbar to check other devices, landscape and the background image.
- Click Next. Stride checks required fields and length rules first and marks any field that needs fixing.
Step 3: Create the experience #
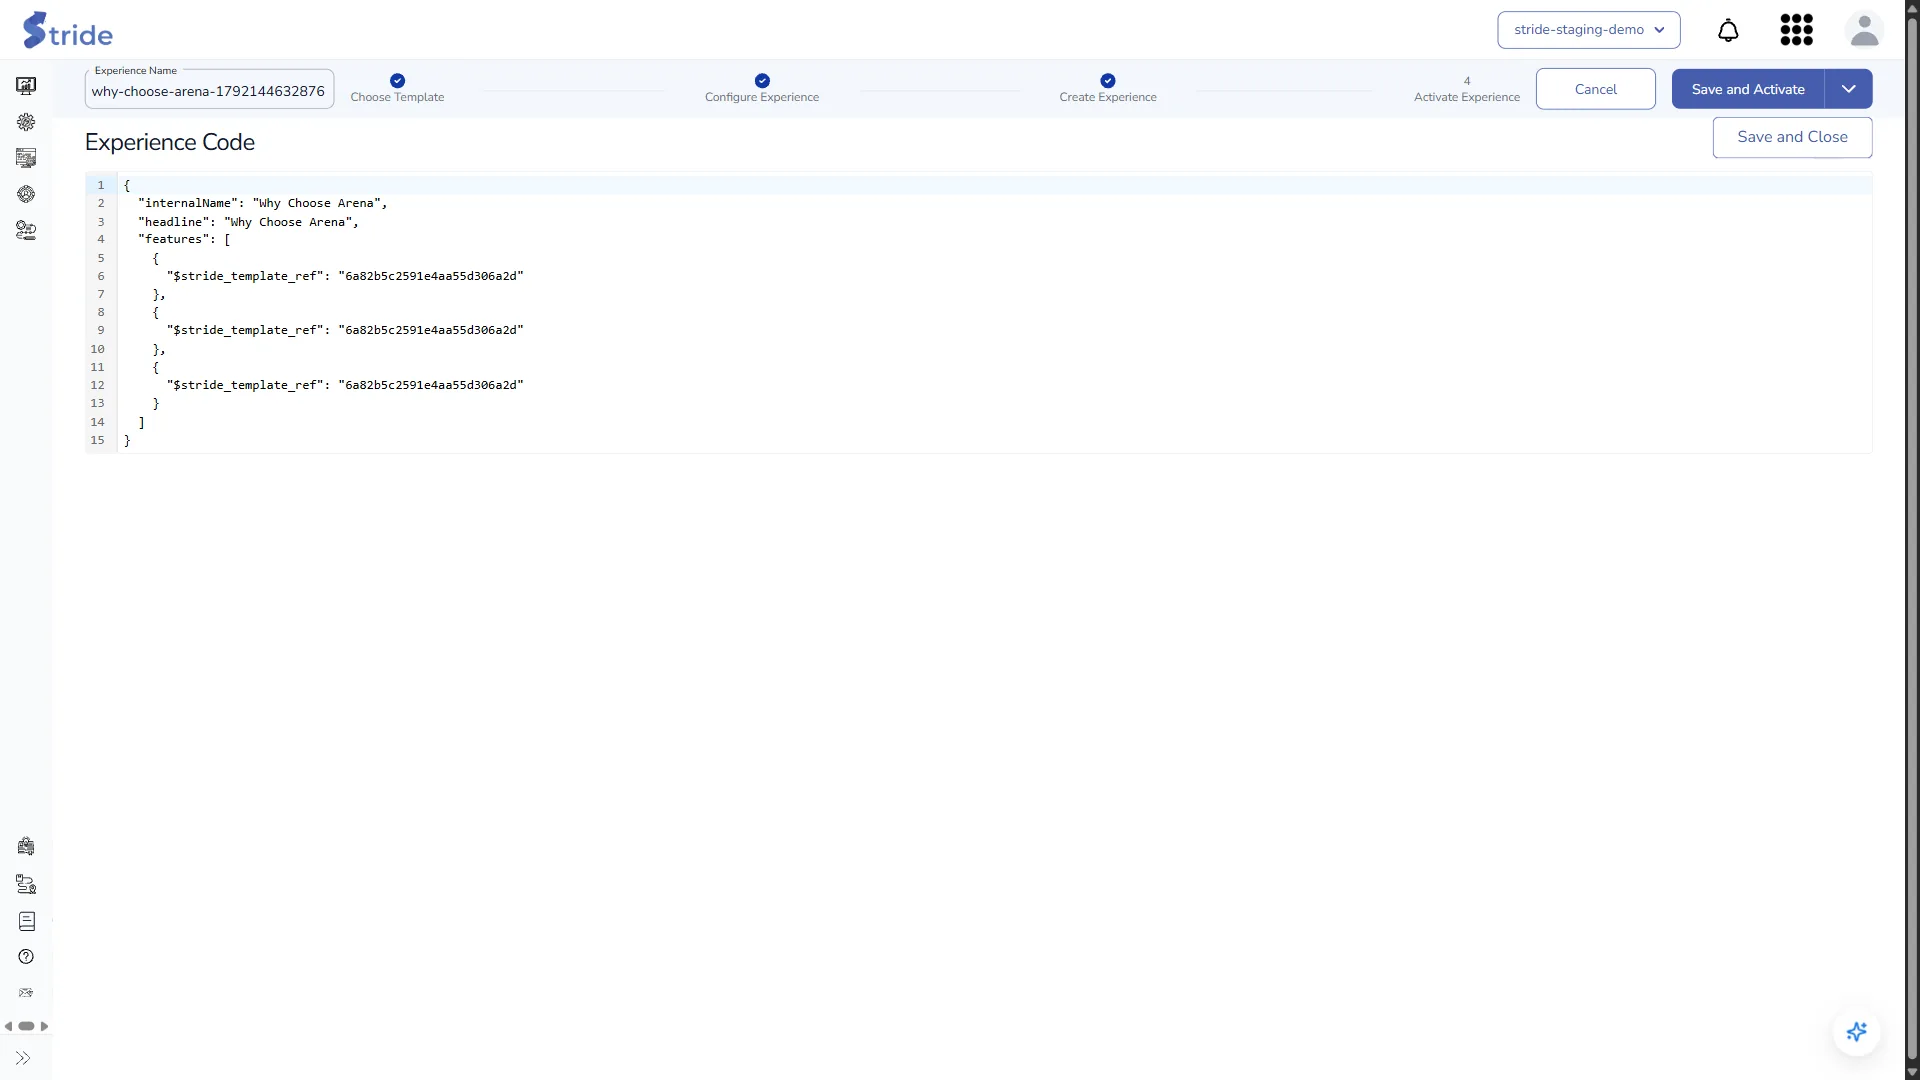
Stride shows the Experience Code: the JSON (or, for templates that render HTML, the HTML) that will be sent to a destination.
- Check the code. The copy icon copies it. If your role allows, the edit icon lets you change the code directly: save your edit and the form fields update to match, or cancel it. JSON must stay valid.
- Save the experience:
- Save and Activate saves it and opens step 4.
- To save without activating, open the arrow next to it and choose Save and Close. You return to Manage Experiences.
Who can do this
If your role can’t activate experiences, the button reads Save and Close, step 4 is skipped and you return to Manage Experiences.
The new experience is saved as a Draft (version 1). It becomes Approved the first time you create an offer, entry or Tealium extension from it, or when you approve it from its details page.


