

Step 3: Plan #
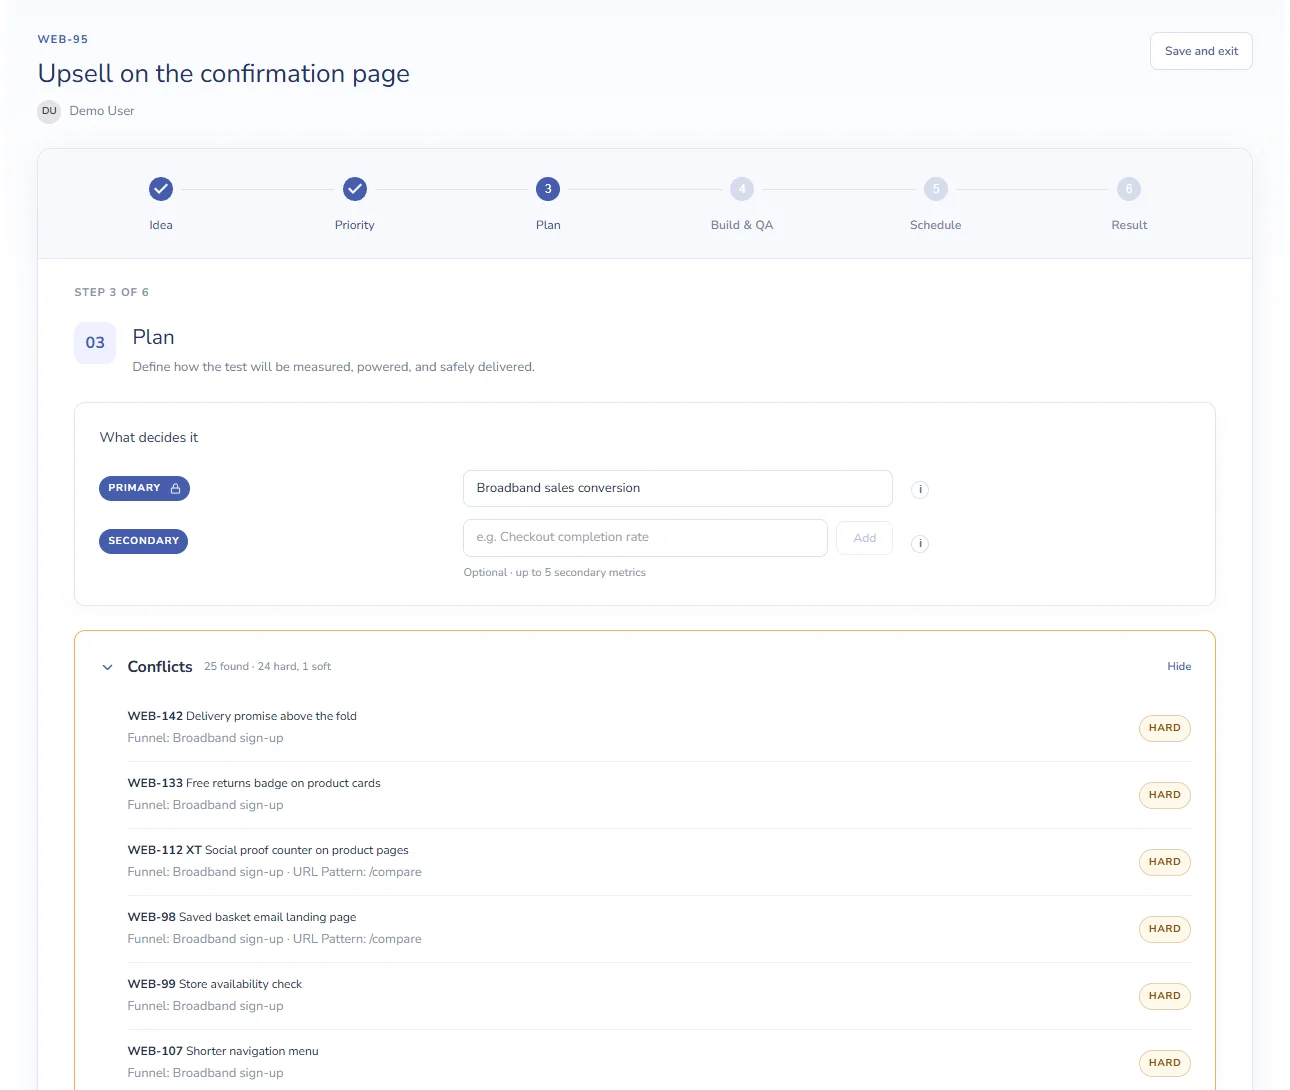
- Primary: the one metric that decides the verdict, for example “Add-to-basket rate”.
- Secondary: up to 5 more metrics to report alongside it. They never decide the verdict.
- Conflicts: other tests with the same value in a location field that has a Hard or Soft conflict role. Matching ignores upper and lower case. Hard means the tests change the same thing and shouldn’t run at the same time; Soft means they might interact.
Click Send to build to move the test to Build & QA.
Step 4: Build & QA #
Variants #
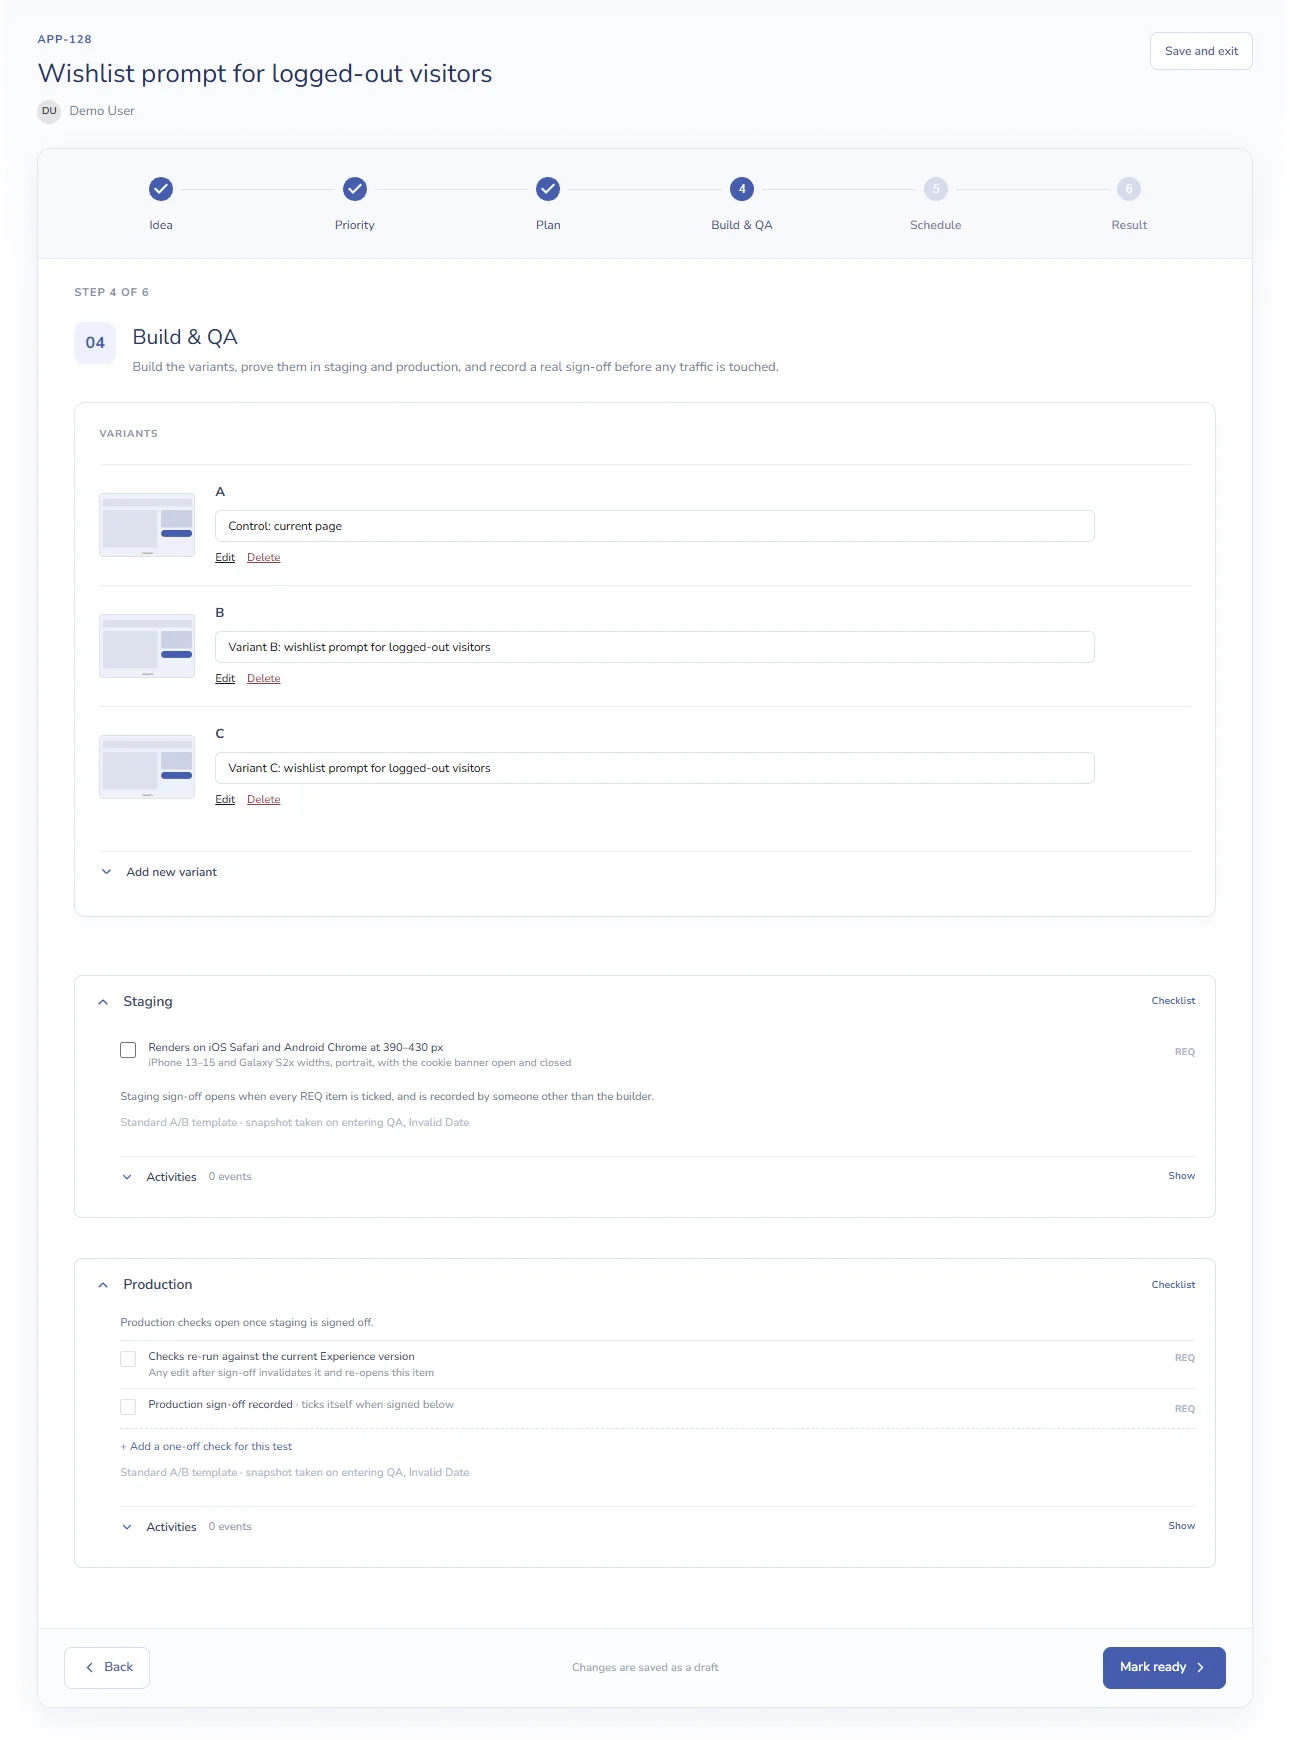
- Click Add new variant.
- Click Upload file and choose a screenshot or design of the variant.
- Enter the Variant details, for example “Control: current page” or “B: sticky button”.
- Click Save.
Variants are lettered in order (A, B, C…), so add the control first. Use Edit to change the file or details, and Delete to remove a variant.
Checklists #
- Staging and Production list the checks from XCM settings. REQ marks a required check and OPT an optional one.
- Tick each check as it passes. Activities shows who ticked or unticked each item, and when.
- + Add a one-off check for this test adds a production check that applies to this test only. Delete it with the bin icon.
Note
Production checks unlock once staging is signed off. Recording staging sign-off isn’t available yet, so production checks are shown but can’t be ticked.
Click Mark ready to move the test to Scheduled. Next: Schedule a test and record the result.


