

Experiences in Stride allow users to design and deploy interactive content with customisable templates.
This guide will walk you through the steps to create, configure, and manage an experience, including editing, duplicating, and deleting existing experiences.
Creating a New Experience #
1. From the Stride dashboard, click on Experiences in the left sidebar.
2. Select Manage experiences.
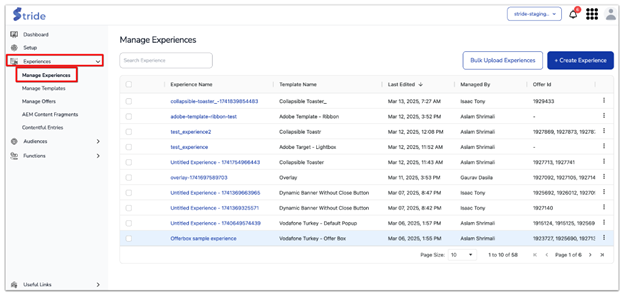
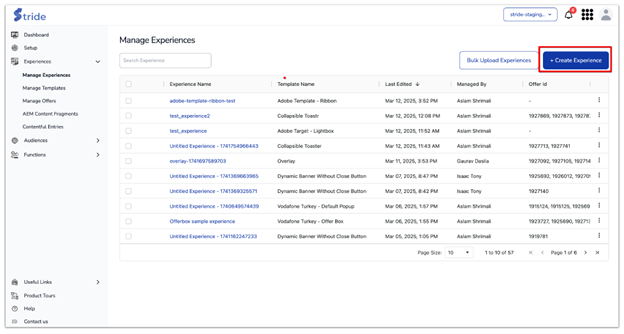
3. In the top-right corner, click on the blue + Create Experience button.
4. You will be presented with a list of available templates. Use the search bar to find a specific template. 5. Select either a Local or Global to narrow down the scope, find the correct template, and click on it to proceed.
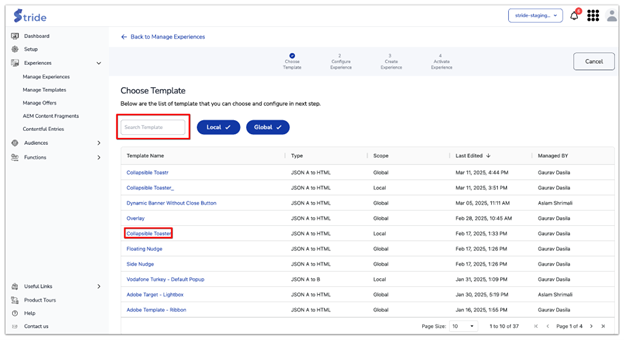
6. After selecting a template, you will need to configure its properties.
The following settings must be defined:
General Settings #
- Template: Defines the template being used, e.g., “Collapsible Toaster.”
- Initial Delay Time: The delay before the experience appears (e.g., 1000ms).
Background Properties #
- Header background colour: The background colour of the header (e.g., #003D99).
- Content cackground colour: The background colour of the content section (e.g., #534FF8).
Auto-hide Settings #
- Auto hide flag: Determines whether the experience auto-hides (True or False).
- Auto hide time: The duration before the experience automatically disappears (e.g., 10000ms).
Header Settings #
- Header icon URL: The URL of the header icon image (e.g., https://stridetech.io/wp-content/uploads/2024/09/bell.svg).
- Header icon alt text: Alternative text for the icon (e.g., “Icon”).
- Header icon width: Width of the icon in pixels (e.g., 30px).
Title Settings #
- Title text: The main heading of the experience (e.g., “Unlock the Power of Innovation!”).
- Title font size: Font size of the title (e.g., 20px).
- Title font colour: Colour of the title text (e.g., #fff).
- Title font family: Font family for the title (e.g., “inherit”).
- Title line height: Line height for the title text (e.g., “normal”).
Message Settings #
- Message text: The description or message within the experience (e.g., “Don’t miss out on the opportunity to transform your digital landscape.”).
- Message font size: Font size of the message (e.g., 20px).
- Message font colour: Colour of the message text (e.g., #fff).
- Message Font Family: Font family for the message (e.g., “inherit”).
- Message Line Height: Line height for the message (e.g., “normal”).
Primary Button Settings #
- Primary button text: Label for the primary button (e.g., “Claim Your Offer”).
- Primary button href: URL to navigate when clicked (e.g., #).
- Primary button font size: Font size of the button text (e.g., 16px).
- Primary button background colour: Background colour of the button (e.g., #fff).
- ETC.
Secondary Button Settings #
- Secondary button text: Label for the secondary button (e.g., “No, Thanks”).
- Secondary button font size: Font size of the button text (e.g., 16px).
- Secondary button background colour: Background colour of the button (e.g., “transparent”).
- ETC.
Subheading Settings #
- Subheading 1 text: First subheading (e.g., “Experience Offer 1”).
- Subheading 1 href: URL associated with the first subheading (e.g., #).
- Subheading 2 text: Second subheading (e.g., “Explore Offer 2”).
- Subheading 2 href: URL associated with the second subheading (e.g., #).
- ETC.
7. Adjust these settings as needed and click Next to proceed.
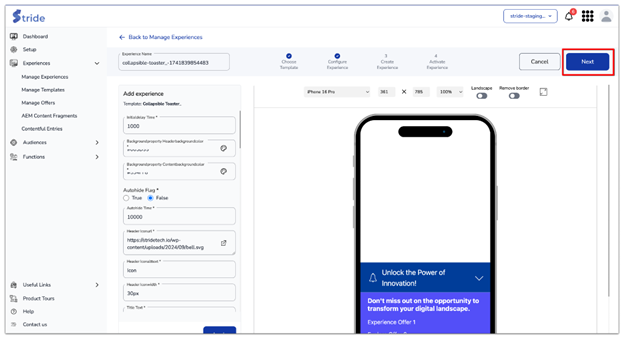
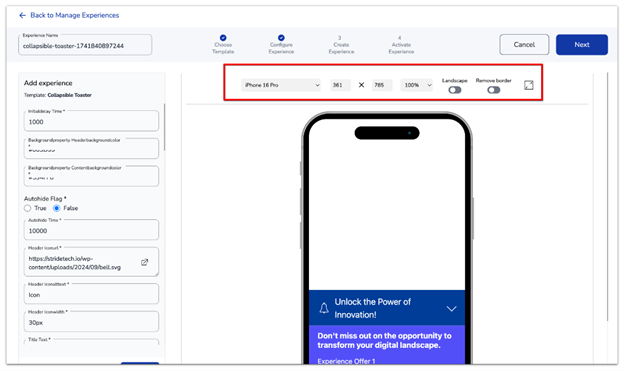
8. At the top of the preview panel, you can:
- Select a device from a dropdown menu (e.g., iPhone 16 Pro, Samsung Galaxy S24, MacBook Pro, iPad Mini, etc.).
- Adjust the zoom percentage to allow larger screens to fit the display window.
- Toggle landscape mode to test responsiveness.
- Enable or disable the border to view the experience without additional interface elements.
- Toggle the full-screen view to the template in fullscreen.
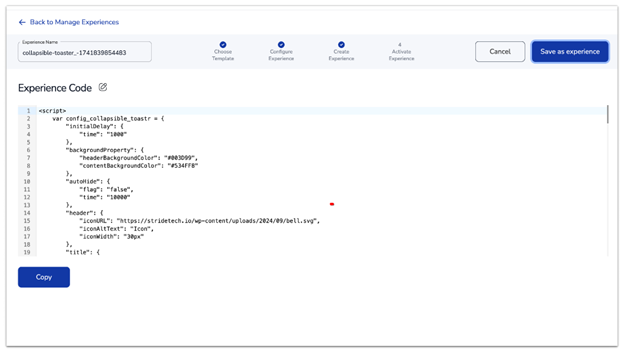
9. Click on Save as experience.
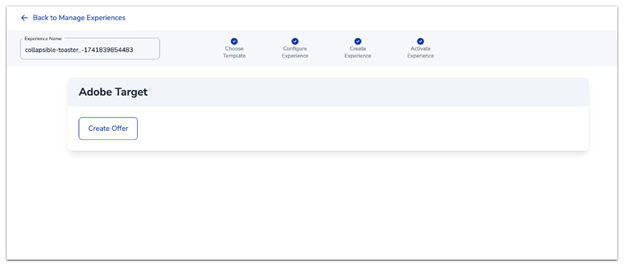
10. Click Create Offer to create an offer with this experience in Adobe Target.
11. Once saved, the experience is ready for activation.
Managing Experiences #
Editing and Activating an Experience #
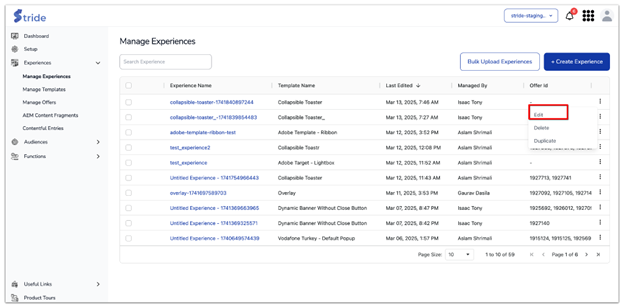
- Navigate to Manage Experiences.
- Locate the experience you want to edit and click on its name or click on the vertical ellipsis and choose the edit option.
- Modify the settings as needed and click Next.
- You can also make changes to your experience using the Experience code. Simply click the edit icon and make the necessary changes before clicking save.
- Click Create Offer to create an offer with this experience in Adobe Target.
Duplicating or Deleting an Experience #
Duplicating an Experience #
- In Manage Experiences, find the experience you want to duplicate or delete.
- Click on the three-dot menu next to it and select duplicate
- A new copy of the experience will appear in the list.
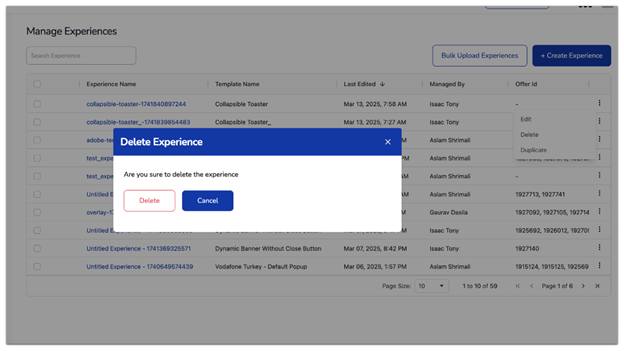
Deleting an Experience #
- To delete an experience, click the Delete option, select Delete, and confirm the action.
Have a question or need further assistance? Email us at [email protected].


