

Managing integrations in Stride allows you to configure and maintain Adobe Target, AEM, and Contentful integrations. This guide walks you through accessing integrations, updating existing ones, setting a default, and creating new integrations.
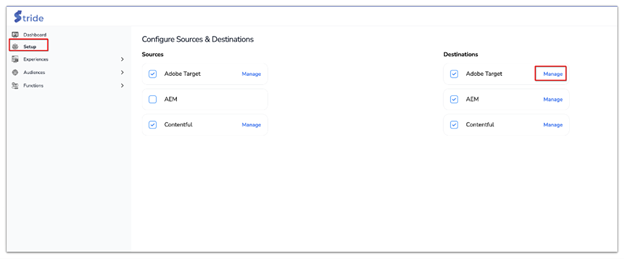
On the left-hand sidebar, click Setup (as highlighted in the first image).
In the Configure Sources & Destinations section, locate the integration type (Adobe Target, AEM, or Contentful).
Click the Manage button next to the source or destination you want to configure.
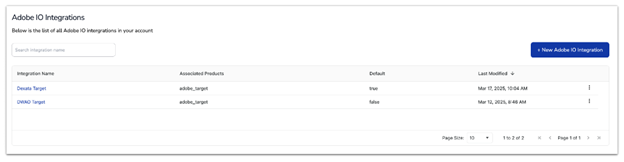
Once inside the selected integration page (Adobe Target, AEM, or Contentful), you will see a list of all existing integrations.
Each row contains details such as:
- Integration Name – The assigned name of the integration.
- Associated Products – The platforms linked to the integration.
- Default Status – Indicates whether the integration is set as the default.
- Last Modified Date – The most recent update to the integration.
Click the three-dot menu (⁝) next to an integration to reveal the following management options:
1. Edit an Integration #
To modify integration settings:
- Click the Edit option in the dropdown menu (as shown in the image).
- Update the necessary fields, such as API credentials, endpoints, or mapping configurations.

- Click Save Changes to apply the updates.
2. Delete an Integration #
To remove an integration:
- Click the Delete option from the dropdown.

- Confirm the deletion that appears in the prompt.
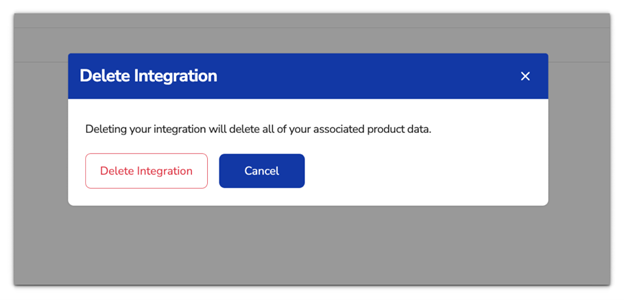
- The integration will be removed permanently.
3. Set an Integration as Default #
If you have multiple integrations, you can set one as the default:
- Click Set as default from the dropdown menu.
- The selected integration will be assigned as the primary integration.
If you need to create a new integration:
- Click the + New [Integration Type] Integration button (as shown in the images).
- Enter the required details.
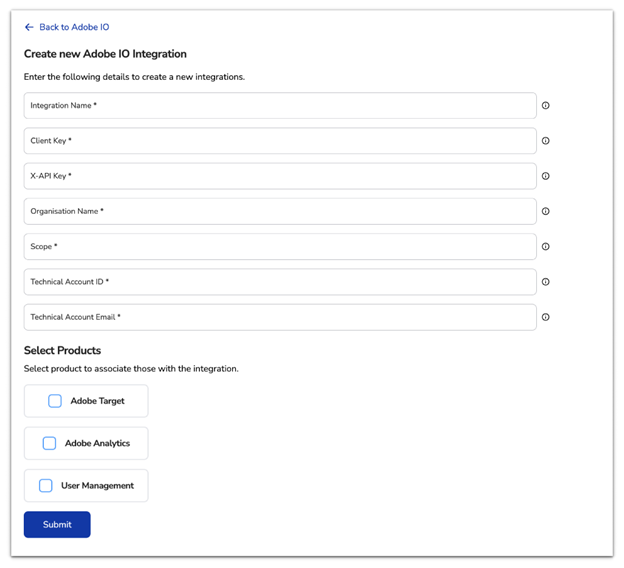
- Click Submit to complete the integration setup.
Have a question or need further assistance? Email us at [email protected].


